Scrapbook Sketch for March 18, 2024

I know it has been a while, but I am back to posting sketches on Mondays. I will alternate between scrapbook sketches and card sketches.  Anyone who completes the sketch AND sends me a picture to post here on the site will be entered to win a retired stamp set from me.Scrapbook sketch 03182024

You can really use the size photos you want, as there is a lot of extra room on the two pages.  I hope to have my interpretation of the sketch posted before Friday.  I can’t wait to see what you come up with!  E-mail your page to Carol@CreativelyCarol.com or text to 801-800-0884.

Single Page Scrapbook Sketch – 3 photos

While the image to the left doesn’t have the
edges of the pages, I am sure you can figure out where the edges of the paper are.  I show three photos in this layout, how will you do yours? Do you have an opinion about the sketch? Need something else? Tell me below what kind of sketches you need, and anything else I can help with.

11 Lessons I Wish I Learned When I Started Scrapbooking

If you read my newsletter this week, you read about the evolution of your personal scrapbook style. I found an old list that I thought you would find interesting. You will see you are not that different from the published scrapbookers you idolize.
” Here are some of the things I know now that I wish I knew then”

  1. Decide what is most important to leave for your posterity. You’ll know which subject matter to include, and you’ll put more heart and soul into the journaling.
  2. Good, strong photographs are the start of any great scrapbook page.
  3. A clean and organized layout is a timeless design.
  4. Color is essential. It will make or break the overall feel of your layout.
  5. Being creative and experimental with techniques and products is great if it helps to enhance the pictures or theme.
  6. Be choosy with your photos. Every photo you take does not need to be scrapbooked
  7. Events and themes that carry on to more than one layout flow nicely together if they look similar in design or color.
  8. Include a title- even if it is a small one – on every layout to announce and clarify the theme of the page.
  9. Don’t forget the everyday stuff. Life is made up of more than birthdays holidays and vacations.
  10. Even if it’s small and insignificant, include the date somewhere on every layout.
  11. This lesson is from the genealogist in me… if you don’t name everyone in the photo in your journaling, take a moment and write the names on the back of the page where it doesn’t affect the design. Somebody looking at your scrapbook 50 years from now most likely won’t know who is in the picture. Journaling often just has 1st names, put the last names on the back if your can.

Bring Bohemian Rhapsody into Scrapbook Pages

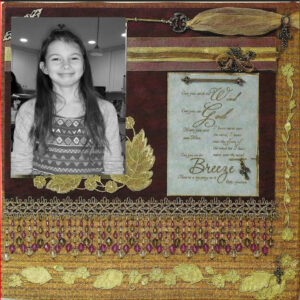
As autumn approaches, the fashion runway embraces a fusion of medieval opulence, Renaissance aesthetics, and a bohemian twist. Rich jewel tones and intricate organic patterns dominate, showcased through sumptuous fabrics such as velvet, lace, and jacquard. Scrapbook papers will mimic these fabrics and can be layered for beautiful pages. Garments are adorned with delightful vintage-inspired details, exuding an effortless and carefree vibe and your scrapbook pages can be too! Envision an enchanting scrapbook page featuring a black crushed-velvet paper adorned with satin bows, a ethereal French vanilla cardstock enhanced with ruching and embroidery, a garnet red lace embellished with ribbon roses and cascading fringe, or a tapestry handbag adorned with buckles and beads. By following the color, texture, pattern, and accessory choices of fashion designers, you can effortlessly incorporate this trend into your scrapbook pages.
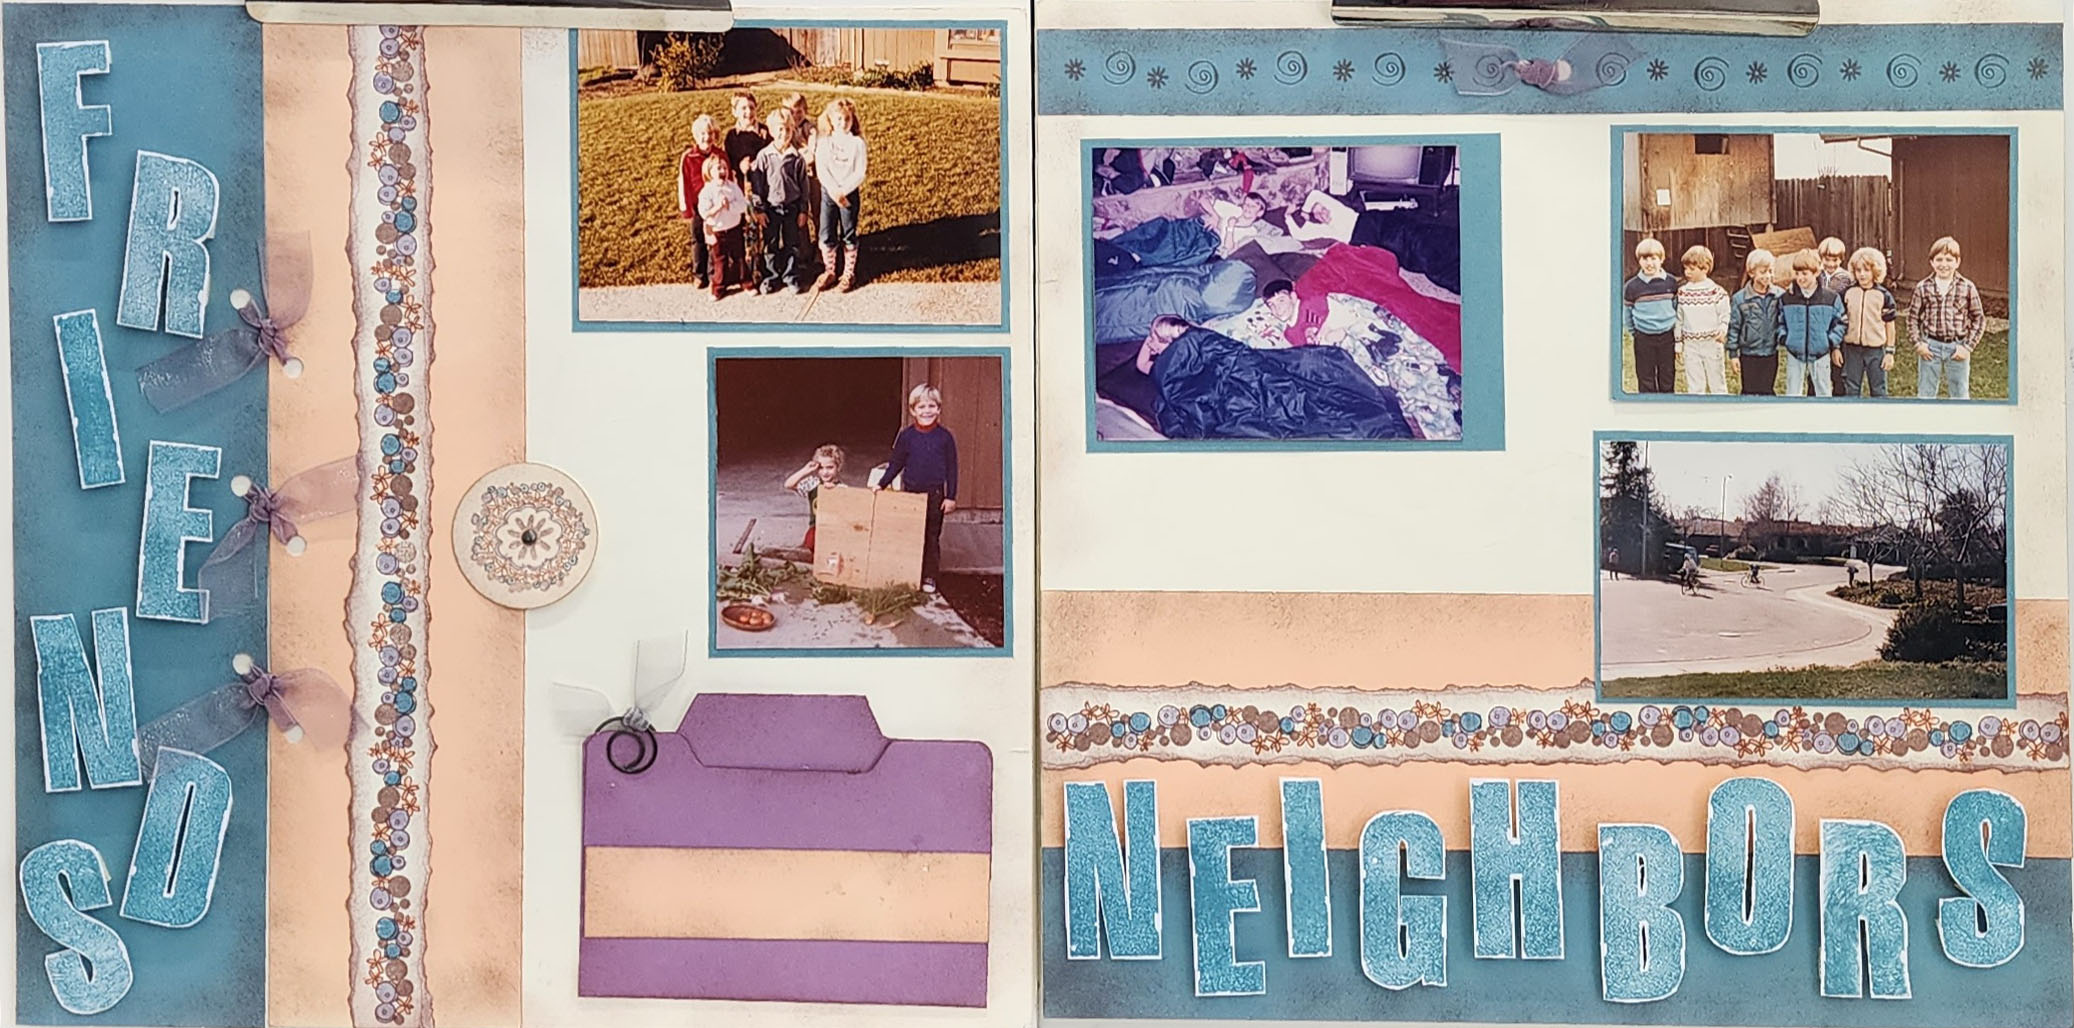
Creating Your Pages

Create a lavish layout base by adhering rows of gold-shot jacquard ribbons to paper with strong double-sided tape. Use a palette of garnet, ruby and copper in conjunction with buckles, pearl buttons and tiny beads to construct a dreamy medieval mood to complement the photos and page theme. Burgundy velvet works with copper crushed paper and paint to balance the intricate ribbons.

Bohemian Rhapsody Defined

Whether you prefer simple or intricate layouts, you can apply bohemian rhapsody style to your pages. Mix the style’s characteristic elements of color, texture, pattern and accessories to express your own bohemian soul.

Color:  Start by picking a color palette. Choose gemstone hues in vibrant combinations with black , chocolate brown and matte metallics as base neutrals. Pick deep shades-ruby and garnet reds, carnelian orange, topaz yellow, emerald and peridot greens, sapphire blues, and amethyst and iolite purples.

Texture: Tactile and tempting describe the textures that work together to create this lux look. Visit a fabric store to touch and feel the materials in the dressy section and ribbon aisle. Look for ingredients such as velvet, lace, satin, beaded and woven trims, tassels , tulle, appliques, tapestry florals, ornate buttons and upholstery gimping.

Pattern:  Envision historical patterns from medieval, Renaissance and Victorian eras such as paisley; fleur-de-lis, soft geometrics and robust florals. Juxtapose and layer patterns to create sumptuous backdrops. Add polish to the layers with stitching or beading, embossing the edges or distressing with sandpaper or ink.

Accessories: To finish your design in grand style, add the dimension and shine of well chosen embel­ lishments. Ribbons of all kinds are the perfect match, so·use them generously as borders and fringe and for corset lacing. Matte metals add a timeless touch in the form of charms, frames, buckles, photo comers, clips, hinges and decorative brads. Add a bit of spar­ kle with beads and buttons. Other appropriate pieces include skeleton and velvet leaves, enameled frames and plaques, silk or paper florals, and ephemera.

If you are a beginner, keep it simple by combining ready-made products like metal frames, photo comers and vintage-style buttons with velvet papers and woven rose ribbon for texture and dimension. Use a die-cut script alphabet to cut letters from red velvet for a fast yet elegant title.

If you are an intermediate scrapper, build upon the simple version by adding distinctive details. Create a faux wax seal, a vignette of collaged ephemera and an embossed title. Cover a large slide mount with velvet paper for a custom frame.

If you are an advanced scrapper, make a deluxe version by creating unique handmade accents. Use rl.1bber stamps and platinum extra thick embossing enamel to create faux metal embellishments. Finish the page with a title hand cut from red velvet.

Leave a comment below and let me know what you think of the bohemian style. I would love to see how you incorporate the bohemian style into YOUR scrapbooks!


A Simple Card Sketch for a Quick and Easy Card

Simple Card SketchIt’s Monday, since my focus has been on scrapbook pages, I thought today was a good day to do a card sketch.Happy Birthday, Make a wish! If you missed sending out a card for Mother’s Day, you can knock this out pretty quickly and stick it in the mail today! My example is themed Happy Birthay because my son will be 41 at the end of the week…

The card base is not outlined in this sketch, so I wanted to point out that the first two strips going from the left cover the card base completely, the third is a little shorter and is set just a bit below the base of the card. As I look at the finished card, I think edge distressing the card would have added a bit more dimension, and would point out the edge better.  See, I make errors in judgement too, often seein what I “should have done.” But you have to remember, there are no “shoulds” in papercrafting, unless you are following scoring lines to put something together. In this case, you could alter any part of this card and it would still be fine.

Here is my finished card. Please leave a comment below and tell me your thoughts on this card sketch and card.


Creatively, Carol


How to Care for your Acrylic Stamps

I get this question alot, especially from new stampers so I wanted to share with you what Close to my Heart’s answer to this question is…

  • Although our stamps are very durable, care must be taken when removing them from the carrier sheet, especially for the first time. To avoid tearing your stamps, gently loosen the edges of each stamp before peeling them off the carrier sheet or your block.
  • Before using your stamps, condition them so ink will transfer evenly. To do so, rub the stamp a stamp pad, and then stamp onto scra paper, twisting while you stamp. Repeat until the inktransfers evenly across the entire surface of the stamp.
  • Each stamp comes with a foam insert. This insert not only helps to protect your stamps but can also be used as a tool while stamping. By placing it under the paper you are stamping on, you will achieve a cleaner, crisper image.
  • Clean your stamps immediately after use and let them air dry. Store stamps on the carrier sheets that come with the envelope (rather than on the block) and keep them out of direct sunlight. Discoloration from inks is normal and does not affect stamp performance. I use the Stamp Shammy for most inks, but for Intense Black or Archival Black, I use the staz-on stamp cleaner.
  • Close to my Heart guarentees its stamps and products to be free from manufacturing defects for a period of 90 days from the date of purchase, and will repair or replace any defective products within that period free of charge. Please inspect your stamps and products immediately upon receipt.

If you have any questions regarding your stamps, or taking care of them, please e-mail me  or leave a comment below.

Creatively, Carol


Same Subject, Different Years, A Two Page Scrapbook Sketch

How do you scrap the same subject, but different years?  I have 4 pictures, 2 are one year, and the other two could be the same year, but I have no way of knowing. Since I tend to use more two page layouts than single ones, I decide to just do one two-page layout since I didn’t want to only have one photo on the page. After all, these are from when normal printing was 3 ½ x 5. That leaves waaay to much empty space in my mind. I put the two I knew the year, and the similarity of the child on the horse, the other two were relagated to the right side, where, if my aunt found other reunion pictures, she could add them to this page pretty easily. The journal box was attached with removable adhesive so if she did need the space, she could remove it.

The title I took from an old piece of 8½ x 11 scrapbook paper. I knew I wouldn’t use it, as I stick to 12 x 12 pages, but I thought it was perfect for the page. I used the same color to ink around the title as the background paper color to give it a softer look.  I also used the tearing technique to give a little demension to the page. I am still thinking about putting a large green tree on the right page, over the torn pieces.

If you have any questions, feel free to shoot me a text at 801-800-0884. Send me a copy of your completed layout and I will put your name in the drawing for a free stamp set at the end of the month.

Did this sketch help in scraping the same subject but different years question for you? Leave a comment below and let me know!

Creatively, Carol

Leftovers Anyone?

Do you keep leftover buttons and beads you find because you know they will come in handy at some point in the future? I wanted to share with you a few ways to use these found treasures in your scrapbook pages.

Using a strong adhesive, you can add buttons and beads to your scrapbook titles,Using MicroBeads as an embellishment

In this layout I used microbeads to make spirals as an embellishment.  First you cut the shape on cardstock, or use a Thin Cut or Cutting machine. Attach a strong adhesive like Liquid Glass, and press the beads into the adhesive. You can do the same things with seed beads and add buttons over the top with a pop-dot.

You can also do bead letters, where the shape doesn’t have to be precise, you can glue directly onto the page, but I prefer to add to cardstock and cut around after they are dry so I am not putting liquid on the page that could cause buckling.

I recommend doing one letter or element at a time. This will give you enough time to get your beads on before the adheasive dries. When the adhesive is dry, tip your embellishment to release all the unglued beads to use another day.


I love using buttons as flowers, and they work well on both cards and scrapbook pages. There are so many fun shapes. Here is a layout using buttons as flowers:

Scrapbooking Baby Pictures

Scrapbooking baby pictures is fun. Today I am going to show you a layout done completely on the computer.  Digital scrapbooking use to be very popular, but I was always a hands on type of scrapbooker. To me it is therapy… cutting the paper, stamping the images. If I am following directions to complete the scrapbook page, then I am not thinking about whatever might be weighing my mind down. If you have lots of children and you want to scrap pictures of grandma

Scrapbooking baby pictures on the computer

that everyone will want in their album, then you can create the layout on the computer and print a copy for each of them.

Here I scanned a piece of scrapbook paper from the Scaredy Cat paper pack from a few years ago. In keepig with the stars motif, I used black stars to highlight Shawn’s name, and used a font color included in the paper. My computer program grabbed the color, but it almost looks peachy instead of golden when put on the black.  I will be creating this layout on paper to go in my cousin’s album. This way I know the colors will match. But I wanted to show you what is possible. This is a great way to scrapbook if you need lots of copies of your pages, or you just don’t have time to do it in paper.

Send me your take on this scrapbooking baby layout at Contest@CreativelyCarol.com and be entered to win a free stamp set!  If you have any questions, please feel free to reach out, I would love to help.

Creativey, Carol

Tying Together the Layers

Here is a great way to tie colors and layers together. I want to share with you another layout I completed for my Aunt to give me cousin. Here are several pictures of the friends in the neighborhood where he grew up.  Using a block E size stamp set, I was able to stamp the title “Friends & Neighbors” and stagger friends  down the left side. IThey would not fit straight down, but I think the staggered look is fun, and since this age group is fun, it worfks.

I have a mini-file folder for hidden journaling where  Shawn can add what he remembers about his friends and neighbors.  I used a border stamp to make the complete line of decoration down the center of the left page and across the right one. A creative way to tie two different colors of cardstock together as you will notice on the left side is to punch some connecting holes and thread ribbon to appear to hold the sides together. using knots instead of bows makes it a bit more masculine. The same element idea appears on the top center of the companion page. Stamping across the top strip gives it interest, but does not compete with the colorful stamped border across the center.  I will include a stamped, lined piece of cardstock incase he wants to list his friends names under the sleepover page.


What do you think of this layout? Leave a comment below and give me your thoughts,

Creatively, Carol


Motivation for Monday with Direct-to-Paper Inking

Good Morning!  Scrapbook page for 1 5x7 and 2 4x6 photosToday I have a scrapbook page for you to use as a sketch and the technique of direct-to-paper inking.  It features space for a 5 x 7 photo as well as 2 4 x 6 photos. You can choose whether you want to have a small 2 x 2 photo on the left and right side or an embellishment.  There is room to put smaller photos above the 4 x 6 mats if you need more space and even a 4×4 to the left of the 5 x 7 if you need it.  If you need any help in doing this layout, please reach out to me either by e-mail or text at 801-800-0884.

If you look closely at the layout, you can see I used the ink direct-to-paper technique to edge the photo mats. I will do a short video on how to do this.


When you have completed your interpretation of this sketch, please text me a picture of your finished layout so I can post it here, as well as enter you into the monthly drawing for a free stamp set.  If you use the technique shown in the photo, you get an extra entry into the drawing. Just a little incentive to get you to go outside your comfort zone.

Creatively, Carol

Scrapping Old School Photos

I have been asked by someone dear to me to create a scrapbook for her son, who I also adore, so I said yes. In the box was an assortment of school photos. While I could have done a page for each year, I thought that would be just too much when I didn’t know the details of his likes and dislikes while he was in school so I opted for putting all of them on a 2-page layout.

I simply labelled the corner with the age, using all the same font and ink to keep it cohesive. Since this is all elementary school and Jr high, it leaves the ability to structure the high school years in another way.

We’ve Got Snow…Again

Snow in Utah 4-3-2023
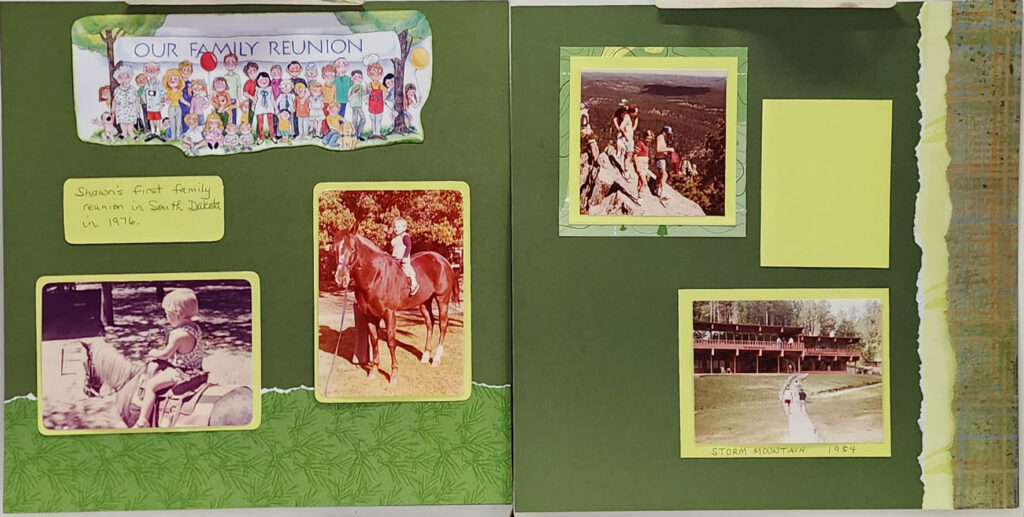
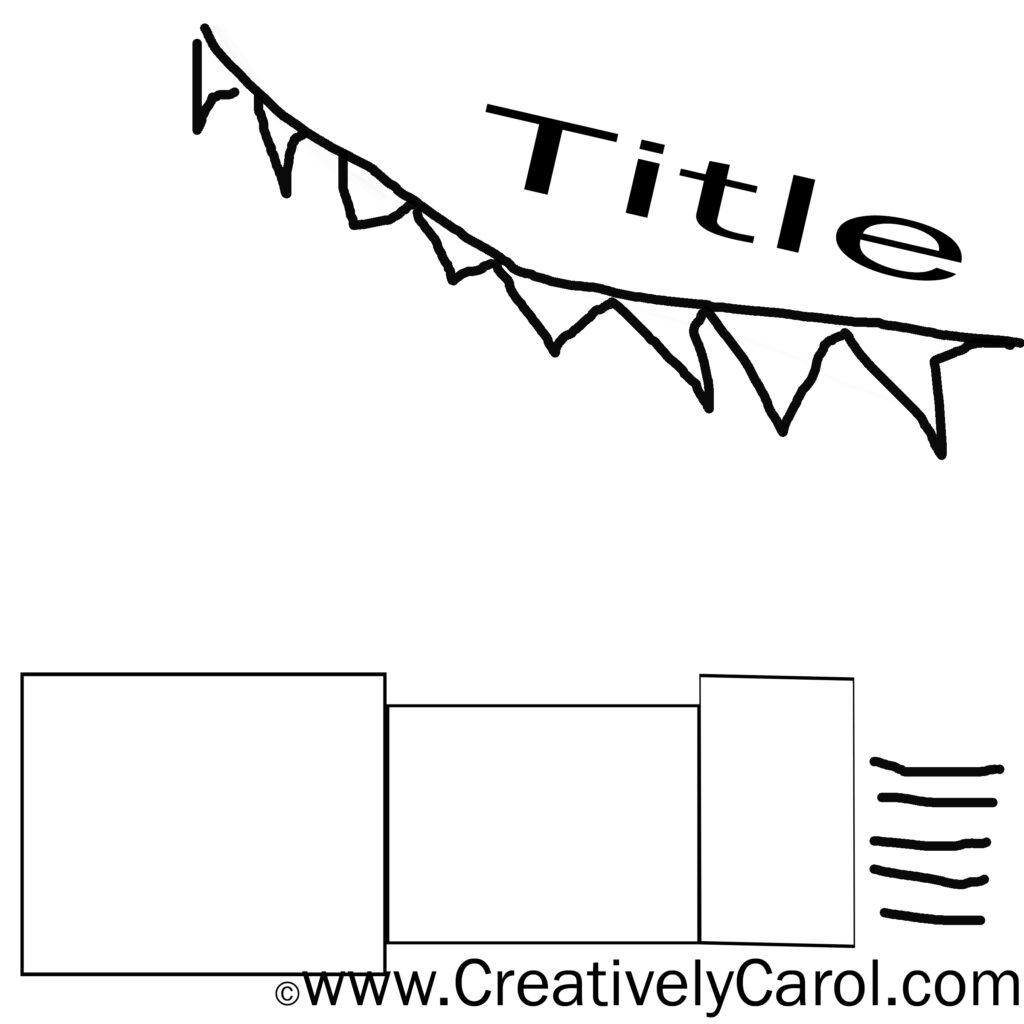
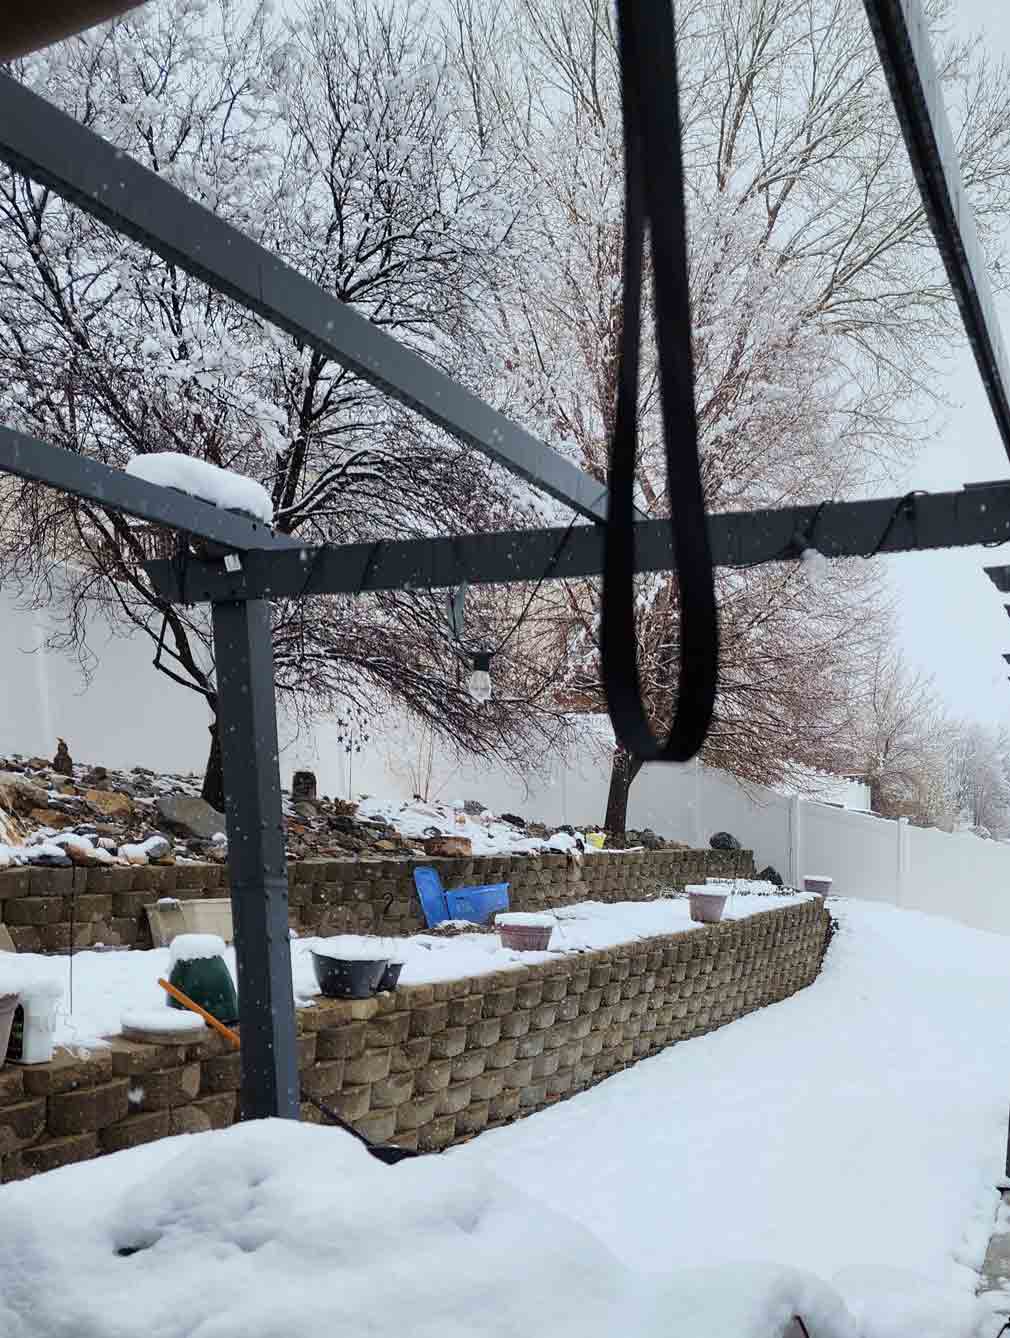
Happy Monday!  I can’t believe that yesterday we had 60-degree weather and no snow was in sight. Today it looks like we have gotten 3″ so far and it is supposed to go on all week!  I am glad that scrapbooking is an indoor activity. Today’s sketch is based on a layout I did of my grandkids many years ago in the snow. I have decided that in order to provide you with sketches each week, and the weekly projects you receive in your e-mail each week (you are on the list, right??) I would have to sketch from some of my finished layouts and leave off the measurements. You can still totally scrap-lift the layout, but this way I can work on tomorrow’s newsletter project.

scrapbook sketch for 3 standard photos
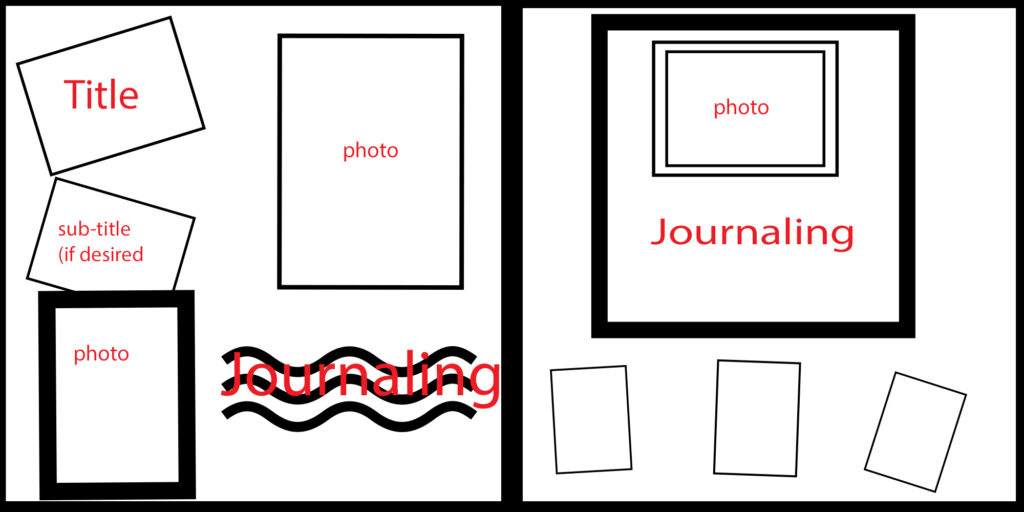
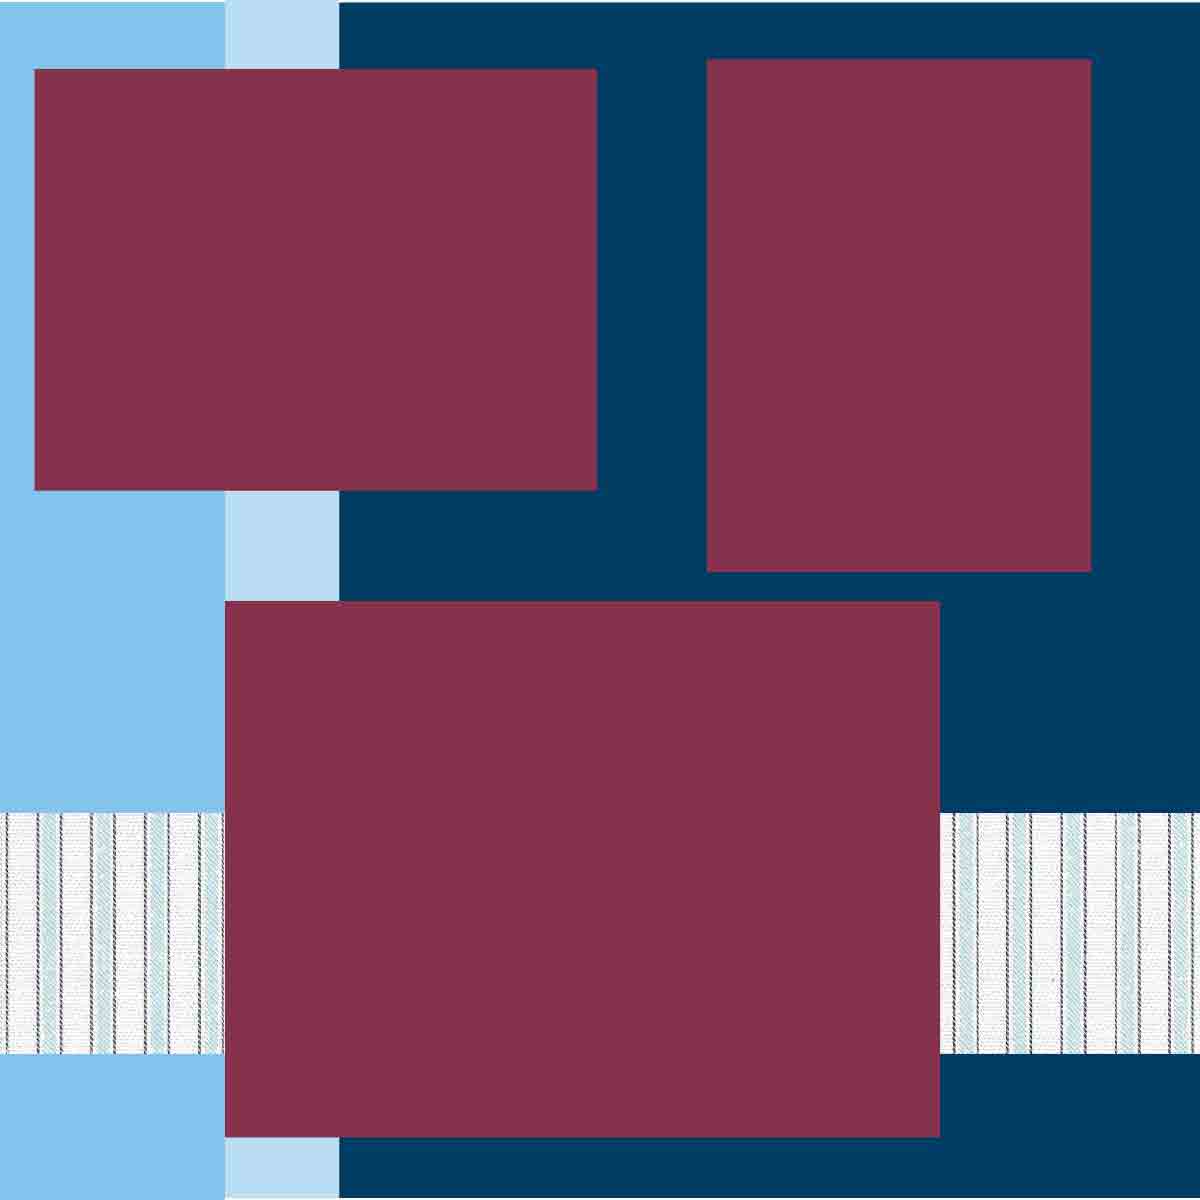
Here is the sketch:  you  have some basic  strips to make up the background, then layer the photos as desired.

Here is the finished layout:Kids playing in snow

I hope you have enjoyed this sketch. In the future you will find projects in my newsletters and only occasionally on the blog so take a moment to sign up for my newsletter in the upper right corner!

Creatively, Carol

Don’t You Hate Unfinished Projects?

Don’t you just hate unfinished projects? I cut the pieces for this layout over a month ago, but since it required I get out the cuttlebug and cut the small papers with the Thin Cuts® I just set it aside for later. Well, later has arrived and I am calling Fridays “UNFINISHED FRIDAYS”.  Every Friday I will pull out a project that has gone unfinished and get it done. You will then see the finished project on my facebook page.

Today’s layout was from a kit called “Celebrating You.”  I had to search for the pictures which I had already had printed through Persnickety Prints which is the same company that prints your free photos if you subscribe to the Scrap with Heart Program.  They do beautiful work. Like I was saying before I got distracted, I had to find the pictures I was going to use.  If I had been smart, I would have put them in the drawers with the papers I had previously cut.

This layout took a bit more work on my part. I had to actually mark my papers to know where to put the triangles.

I thought I had found a way to save the wear and tear on the magnetic mat I use with my cuttlebug. The directions said to stack the squares, and when I cut them, it didn’t damage the mat at all, but then I had to manually cut all the cuts apart because it didn’t cut all the way through. I will try this again, with perhaps more thickness in my stack, as not damaging the magnetic mat would be an awesome savings.

I hope you will join me each Friday for “Finish It Up Friday” and work on those unfinished projects.  Send me a photo of your finished project and get entered into the monthly drawing for a free stamp set. Send it to Carol@CreativelyCarol.com and I will post it here on the blog.

Now go check out my facebook page and see the finished layout!


The Other Side of the Page

Happy Monday!

Since today is a holiday here in the US, I hope you are doing something fun, and took lots of pictures and are here to get ideas on how to get them on the scrapbook page.  Last week I showed you the left side of the sports page for my son, Will. Today I want to share with you the companion sketch and resulting scrapbook page.  In this layout, I used a double mat to increase focus on the largest photo of the layout. I chose this picture because Will seemed to enjoy wrestling above all other sports in his school days.  He turned 40 last year and I remember him telling his nephew he could still take him on… that didn’t go so well 🙂

I chose a tag to feature the football picture from his freshman year, the only year he played high school football, and a pocket for the journaling. This is a great way to include events or stories on your pages without putting that story out there for just anyone to see.  I like to use pocket journaling when a detail might be a bit private, I still want to document the memory or thought, I just don’t need anyone else to read it, at least not at this time. Someone would have to make an effort to read the journaling, and that is not likely if someone is just flipping pages in your book.

Leave a comment below and tell me how you would use hidden journaling on your pages.

Creatively, Carol