10 Suggestions to Scrapbook the Everyday Life you Lead

I have heard and read many times you should scrapbook your everyday life as well as all those events, vacations and gatherings.  When I hear this I think “how boring, I don’t do anything special”. When you think about it, you have about 16 hours in a day, IF you are lucky enough to get 8 hours of sleep a night.  One way to do this would be to do a 3 x 3 box across the top, and bottom of a 2 page layout.  That would give you 16 blocks in which to put photos, using the center for more detail.  You might have to get some help with the picture taking (great time to show your oved one what you do all day) or use the timer setting on your phone.

Do you do specific things on specific days? Depending on your age, you remember the dishtowels our grandmother’s had that had every day of the week. You could put 7 boxes across the middle of the page and title each box for the day of the week and put a picture of what it is you do.  Here are some ideas for days of the week photos:

  1. Sunday – church, football, or whatever consumes your Sundays
  2. Monday – laundry… you can take a picture of the dirty mountain of laundry or the basket of folded clothes. You could even add a bit extra by mounting the photo on a 6″ x 3″ piece of cardstock folded in half. Inside you might put if kids do their own laundry or if you have a special sock sorter 🙂
  3. Tuesday – do I dare say ironing these days? Not this girl, so what do you do on Tuesday, perhaps you vaccume the house after a busy weekend.
  4. Wedensday – grocery shopping, take a picture of your favorite grocery isle.
  5. Thursday – Do people still dust regularly? maybe this is something you have one of the kids do… take their picture doing it.
  6. Friday – If you are lucky, Friday is date night. Take a picture on your next date. What else do you do on Friday so you have your weekend free?
  7. Saturday – hopefully you are not stuck doing housework, but the kids have Saturday morning chores. If you have several children, get a picture of all of them working and put together as a book for this block.

Now that I have shared this idea with you, I am going to have to do a page like this myself.  Since my husband and I live with my daughter and her family, I may have to get a bit creative…. check back often to see what I may have come up with!

What are your daily/weekly things you do? Leave a comment below and share with us!

What Are You Waiting For?

Print your photos before you forget what they represent
Old man scratches his head that something forgotten

My husband has been having headaches and major pain in his head for quite some time. We keep going for tests, but only after a PET scan did I learn that my husband has Frontotemporal dementia. Why am I sharing this with you, you are wondering. One very concerning part of this dementia is that he is loosing his memory. While we wish it would affect his long-term memory (all the stuff that has happened in your life you WANT to forget) it has a more pronounced affect on his short term memory. Suddenly, memory keeping sounds much more important that just a hobby of scrapbooking.

Here is a quote I read recently, (author unknown) “Memory is a way of holding onto the things you love, the things you are, the things you never want to lose”. I thought it was rather profound considering at 65, I catch little blips on my memory scale.

The truth is, we never know what life is going to deal us. Scrapbooking the memories we are making today is important. I know what you are thinking, as so many people do, “the photos are in my phone.” You think they are safe, you would never delete them, at least now on purpose. Let me share with you a sad story my sister-in-law experienced. We had a big family reunion in Moab, Utah. There was a day that 5 families with their jeeps took to the trails. This included my brother and his wife, my son-in-law and his boys, and my two sons with their kids. Never before had all of them done something together like this and lots of pictures and videos were taken. They had a ball. That night, my son was telling Josie how she could share them on google photos, (Josie has an Iphone, while the rest of us are android users. So Josie uploaded all the photos in her phone to the google cloud. Then, because she didn’t realize she could just share the photos she wanted to share, she started deleting photos that were not of the trip… 8 years worth the photos were now deleted from both her Icloud AND Google Cloud. She was devastated, cried for days. Pictures going back to my nephew playing high school baseball, then for UNR, my niece’s graduation and so many family get togethers and personal vacations.

Take the time to print your photos, even if you don’t feel you have the time to scrapbook them. I will show you ways to keep those photos using instant pages that just require you slip the photo in, and a card with the details. I will also give you easy layouts you can do in less than an hour if you want something a bit more details. Just don’t let what happened to Josie happen to you. If you are an Amazon Prime member, you can back up automatically an unlimited number of photos.

I would rather sort through multiples of the same photo (which I often do) rather than try to collect from others what I have lost.

Do you have a story to tell about your photos? Leave a comment below and share your story.

Intense Black or Archival Black ?

You would think Intense and Archival black ink were the same thing when you look at the packages. they both say permanant, solvent based ink and acid free. Both are waterproof, but the main difference is the Intense Black is fast drying which essentially means you can start coloring just after you stamp it. If you were to use the Archival Black, you would want to wait until it dries.

Close to my Heart states their recommendations as:

Intense Black: Recommended for use with watercolors or alcohol markers.

Archival Black: Recommended for scrapbook pages and stamping on vellum.

The Black Close to my Heart Ink is waterbased, and only recommended when you are NOT using anything with it.


If you have any questions, please leave them below in the comment section.

Creatively,

Carol


A Simple Card Sketch for a Quick and Easy Card

Simple Card SketchIt’s Monday, since my focus has been on scrapbook pages, I thought today was a good day to do a card sketch.Happy Birthday, Make a wish! If you missed sending out a card for Mother’s Day, you can knock this out pretty quickly and stick it in the mail today! My example is themed Happy Birthay because my son will be 41 at the end of the week…

The card base is not outlined in this sketch, so I wanted to point out that the first two strips going from the left cover the card base completely, the third is a little shorter and is set just a bit below the base of the card. As I look at the finished card, I think edge distressing the card would have added a bit more dimension, and would point out the edge better.  See, I make errors in judgement too, often seein what I “should have done.” But you have to remember, there are no “shoulds” in papercrafting, unless you are following scoring lines to put something together. In this case, you could alter any part of this card and it would still be fine.

Here is my finished card. Please leave a comment below and tell me your thoughts on this card sketch and card.


Creatively, Carol


How to Care for your Acrylic Stamps

I get this question alot, especially from new stampers so I wanted to share with you what Close to my Heart’s answer to this question is…

  • Although our stamps are very durable, care must be taken when removing them from the carrier sheet, especially for the first time. To avoid tearing your stamps, gently loosen the edges of each stamp before peeling them off the carrier sheet or your block.
  • Before using your stamps, condition them so ink will transfer evenly. To do so, rub the stamp a stamp pad, and then stamp onto scra paper, twisting while you stamp. Repeat until the inktransfers evenly across the entire surface of the stamp.
  • Each stamp comes with a foam insert. This insert not only helps to protect your stamps but can also be used as a tool while stamping. By placing it under the paper you are stamping on, you will achieve a cleaner, crisper image.
  • Clean your stamps immediately after use and let them air dry. Store stamps on the carrier sheets that come with the envelope (rather than on the block) and keep them out of direct sunlight. Discoloration from inks is normal and does not affect stamp performance. I use the Stamp Shammy for most inks, but for Intense Black or Archival Black, I use the staz-on stamp cleaner.
  • Close to my Heart guarentees its stamps and products to be free from manufacturing defects for a period of 90 days from the date of purchase, and will repair or replace any defective products within that period free of charge. Please inspect your stamps and products immediately upon receipt.

If you have any questions regarding your stamps, or taking care of them, please e-mail me  or leave a comment below.

Creatively, Carol


Same Subject, Different Years, A Two Page Scrapbook Sketch

How do you scrap the same subject, but different years?  I have 4 pictures, 2 are one year, and the other two could be the same year, but I have no way of knowing. Since I tend to use more two page layouts than single ones, I decide to just do one two-page layout since I didn’t want to only have one photo on the page. After all, these are from when normal printing was 3 ½ x 5. That leaves waaay to much empty space in my mind. I put the two I knew the year, and the similarity of the child on the horse, the other two were relagated to the right side, where, if my aunt found other reunion pictures, she could add them to this page pretty easily. The journal box was attached with removable adhesive so if she did need the space, she could remove it.

The title I took from an old piece of 8½ x 11 scrapbook paper. I knew I wouldn’t use it, as I stick to 12 x 12 pages, but I thought it was perfect for the page. I used the same color to ink around the title as the background paper color to give it a softer look.  I also used the tearing technique to give a little demension to the page. I am still thinking about putting a large green tree on the right page, over the torn pieces.

If you have any questions, feel free to shoot me a text at 801-800-0884. Send me a copy of your completed layout and I will put your name in the drawing for a free stamp set at the end of the month.

Did this sketch help in scraping the same subject but different years question for you? Leave a comment below and let me know!

Creatively, Carol

Color My World…

Close to my Heart Color PalOur color preferences are often motivated by the memories we have and the reactions to the mood that color brings. My favorite color is blue. Blue brings me peace, whether it is blue sky or  blue ocean, sometimes I wonder if it is because I have blue eyes and for years I thought my eyes were my best feature.

Color is everywhere and can be very inexpensive or even free to bring into your living spaces. By having more color in your living spaces and in your clothing, it is easier to pick out the colors you want to use in your scrapbook. We often choose a color in a photograph to bring out in the form of mats or background papers. Here are 6 reasons you may be avoiding more color in  your life.

  1. I’m afraid of …Seriously, what’s the worst thing that can happen? Color can’t kill you . Stop living with boring beige and white, and as the saying goes… “put on your big girl panties” Be bold, color makes you feel good.  My daughter use to say I dressed like an old lady. I started bringing color into my wardrobe after that. Besides, you can always go back to beige, but why would you want to?
  2. It takes too much time.In the time it takes you to watch a movie, you can paint a room , make a lively scrapbook page, pick and arrange some fresh flowers or choose excit­ing accessories for your wardrobe and Add color you’ll feel more alive. Take a look at the Close to my Heart color pallette for some colors that work well together.
  3. I can’t decide on a color, so I pick nothing. Pick several colors you love, and start incorporating them in different, inexpensive ways . Buy some funky socks, pretty ribbons for your hair or colored pencils to use for doodling. Add­ing small shots of color around you will inspire you to use color more often and in larger doses. We are told so much that our homes should be painted in neutral colors, so in my last home, I painted the bathroom tomato red!  Of course when we sold the house, they wanted a “paint allowance”
  4.  I have trouble committing. Try adding tem­ porary color that can easily be changed. Wrap a throw pillow in a brightly colored scarf to liven up a room, fill a bowl with lemons or apples to create a centerpiece or tape several sheets of cardstock to a wall to help you get used to a vibrant color in a room. Once you are acclimated to bolder colors, you can make more permanent decisions.
  5. I don’t know what I like. Sometimes it’s easier to see what you like in a smaller space. Visit here and look at the scrapbook papers, find one you like and take it to the paint store and they can match the color, so you can incorporate those colors into a room by painting one wall or a small piece of furniture. Or, frame the patterned paper for a piece of instant, in­ expensive art.
  6. I tend to choose the  same  colors  over  and  over, but I’m bored with them . Always reaching for blue? Sometimes we just know what we like. Branch out and choose a variety of shades in that Try navy, Robin’s egg blue, cobalt or pale stone blue.  Experiment with many shades, tones and finishes. Seeing a variety of your favorite hue will then lead you to branch out into complementary colors.

What colors are you drawn to? Decide on your signature col­or palette(s). These should be colors that make you happy.

What colors do you associate with good or bad memories? The telephone and appliances has been gone for more than 40 years, but each time I see a particular shade of avocado green or that awful yellow, I remember the fridge my parents had in the ’70s,  now seems ugly and outdated. Colors that bring up sad memories also can easily be avoided, so you can feel happy and confident with your choices.

Are there colors do you love but are afraid to use? Choose questionable colors to in small doses until you are confident with them. Living a color-confident life will empower you and make your art more powerful.

Creatively,

Carol

Leftovers Anyone?

Do you keep leftover buttons and beads you find because you know they will come in handy at some point in the future? I wanted to share with you a few ways to use these found treasures in your scrapbook pages.

Using a strong adhesive, you can add buttons and beads to your scrapbook titles,Using MicroBeads as an embellishment

In this layout I used microbeads to make spirals as an embellishment.  First you cut the shape on cardstock, or use a Thin Cut or Cutting machine. Attach a strong adhesive like Liquid Glass, and press the beads into the adhesive. You can do the same things with seed beads and add buttons over the top with a pop-dot.

You can also do bead letters, where the shape doesn’t have to be precise, you can glue directly onto the page, but I prefer to add to cardstock and cut around after they are dry so I am not putting liquid on the page that could cause buckling.

I recommend doing one letter or element at a time. This will give you enough time to get your beads on before the adheasive dries. When the adhesive is dry, tip your embellishment to release all the unglued beads to use another day.


I love using buttons as flowers, and they work well on both cards and scrapbook pages. There are so many fun shapes. Here is a layout using buttons as flowers:

Scrapbooking Baby Pictures

Scrapbooking baby pictures is fun. Today I am going to show you a layout done completely on the computer.  Digital scrapbooking use to be very popular, but I was always a hands on type of scrapbooker. To me it is therapy… cutting the paper, stamping the images. If I am following directions to complete the scrapbook page, then I am not thinking about whatever might be weighing my mind down. If you have lots of children and you want to scrap pictures of grandma

Scrapbooking baby pictures on the computer

that everyone will want in their album, then you can create the layout on the computer and print a copy for each of them.

Here I scanned a piece of scrapbook paper from the Scaredy Cat paper pack from a few years ago. In keepig with the stars motif, I used black stars to highlight Shawn’s name, and used a font color included in the paper. My computer program grabbed the color, but it almost looks peachy instead of golden when put on the black.  I will be creating this layout on paper to go in my cousin’s album. This way I know the colors will match. But I wanted to show you what is possible. This is a great way to scrapbook if you need lots of copies of your pages, or you just don’t have time to do it in paper.

Send me your take on this scrapbooking baby layout at Contest@CreativelyCarol.com and be entered to win a free stamp set!  If you have any questions, please feel free to reach out, I would love to help.

Creativey, Carol

Where You Store Your Scrapbooks Matters!

Keeping your Scrapbook Albums Safe

Are Your Scrapbooks Safe?

Are your grandmother’s old photos in the attic in a box? Time to get them out of there! Safe Scrapbooking doesn’t just start with quality, acid-free supplies, but it ends with where and how you store completed albums. Improper conditions can cause more damage than acidic elements.  To maximize the longevity of both your scrapbooks and the priceless memories they contain, follow these basic storage guidelines.

Choose a cool, dry storage place, which means keep them out of the attic! Heat and humidity are the two most dangerous elements in any storage environment. High heat makes photos fade faster, twice as fast for every 10 percent increase in temperature. High humidity can cause photos to become sticky, develop stains or grow fungus. Additionally, wide fluctuations in temperature and humidity can cause photos to crack, wrinkle or delaminate. Now you know it is time to get grandma’s pictures out of the attic or the garage and into a scrapbook. Excess heat and humidity can also cause scrapbook papers, inks and other materials to deteriorate.

Overexposure

To avoid exposing your albums to temperature extremes, store your scrapbooks in the coolest location in your home. The relative humidity should stay between 20% and 50 % and the temperature should not get above 77 degrees. This means you want to avoid hot attics and damp basements. A shelf or closet on the main floor is often the best location. And if you think about it, they are more likely to get looked at long after you created them if they have a special place in your home. Given the investment in photos and supplies, it may be worth it to purchase an accurate thermometer and hygrometer to track temperature and humidity in your storage area depending on where you live. If you find that the relative humidity often exceeds 65 %, think about a dehumidifier. Air conditioning during hot summer months also helps avoid extreme heat and humidity.

Storage Direction

Store your scrapbooks vertically with the spine facing out and the sides supported with slight, gentle pressure. In other words, keep the shelf tight, so each album holds up the other ones. Don’t leave scrapbook albums open and on display,  light exposure can cause photos, papers and inks to fade and yellow and dry out the adhesive.

prevent pressure problems Elements such as eyelets, brads, wire, sequins, beads and buttons must be used with care to avoid physical damage during storage. These embellishments can cause indentations or abrasions on scrap­ book pages, especially if albums are stored with excessive pressure on their sides.

If you are like me, you have used lots of dimensional elements, brads, ribbons, buttons, you get the idea, on your pages, you can use spine extenders between the pages to prevent pressure damage, think of the impression or even a hole a brad can make on your next page if it is packed too tightly.It is generally a good idea to plan your albums around 3-D ele­ments when possible. Simply do not place photos directly across from 3-D embellishments on a facing page so there is less chance for damage.

Think of things this way, you spend good money on your scrapbooking hobby, and how crushed you would be if they got damaged. While I am not an advocate of keeping all your photos only on your camera or a backup disc, I am also not one to just put all that hard work in the album and hope for the best. I photograph every scrapbook page that I create, just in case there was a flood or fire, and those are backed up to a cloud.  One less thing to worry about when keeping your scrapbooks and photographs safe.

Creatively, Carol


Tying Together the Layers

Here is a great way to tie colors and layers together. I want to share with you another layout I completed for my Aunt to give me cousin. Here are several pictures of the friends in the neighborhood where he grew up.  Using a block E size stamp set, I was able to stamp the title “Friends & Neighbors” and stagger friends  down the left side. IThey would not fit straight down, but I think the staggered look is fun, and since this age group is fun, it worfks.

I have a mini-file folder for hidden journaling where  Shawn can add what he remembers about his friends and neighbors.  I used a border stamp to make the complete line of decoration down the center of the left page and across the right one. A creative way to tie two different colors of cardstock together as you will notice on the left side is to punch some connecting holes and thread ribbon to appear to hold the sides together. using knots instead of bows makes it a bit more masculine. The same element idea appears on the top center of the companion page. Stamping across the top strip gives it interest, but does not compete with the colorful stamped border across the center.  I will include a stamped, lined piece of cardstock incase he wants to list his friends names under the sleepover page.


What do you think of this layout? Leave a comment below and give me your thoughts,

Creatively, Carol


A Shammy Just for Stamps!

The New Stamp Shammy!

We have seen the Close to my Heart Spritz Cleaner and the scrubbers go away, but in it’s place is the new Shammy for your stamps.  Let’s face it, a lot of you were using baby wipes anyway, and while they are disposable, this is a much better solution.  Just a little water to clean your stamps, then a dab of soap to clean the shammy and you are good to go.

One thing to remember is if you leave it in a scrunched-up little ball after washing it, it will, in fact, dry in a scrunched-up little ball!  There is a case your can get for drying your shammy, but I thought it was a bit too pricy for me. I have since found it dried in a ball, so I might have to reconsider this purchase.

The only think I am not crazy about is that it dries so quickly. When we had the spritz, I could just spray it on, it was always in a bottle, so always wet. Since it does need to be washed with soap and water, it is one extra step during the day while I am stamping since I didn’t put a sink in my office.

I hope this has helped you with how to clean your stamps. If you have any questions, leave them below and I will get them answered for you.

Creatively, Carol

Motivation for Monday with Direct-to-Paper Inking

Good Morning!  Scrapbook page for 1 5x7 and 2 4x6 photosToday I have a scrapbook page for you to use as a sketch and the technique of direct-to-paper inking.  It features space for a 5 x 7 photo as well as 2 4 x 6 photos. You can choose whether you want to have a small 2 x 2 photo on the left and right side or an embellishment.  There is room to put smaller photos above the 4 x 6 mats if you need more space and even a 4×4 to the left of the 5 x 7 if you need it.  If you need any help in doing this layout, please reach out to me either by e-mail or text at 801-800-0884.

If you look closely at the layout, you can see I used the ink direct-to-paper technique to edge the photo mats. I will do a short video on how to do this.


When you have completed your interpretation of this sketch, please text me a picture of your finished layout so I can post it here, as well as enter you into the monthly drawing for a free stamp set.  If you use the technique shown in the photo, you get an extra entry into the drawing. Just a little incentive to get you to go outside your comfort zone.

Creatively, Carol

Scrapping Old School Photos

I have been asked by someone dear to me to create a scrapbook for her son, who I also adore, so I said yes. In the box was an assortment of school photos. While I could have done a page for each year, I thought that would be just too much when I didn’t know the details of his likes and dislikes while he was in school so I opted for putting all of them on a 2-page layout.

I simply labelled the corner with the age, using all the same font and ink to keep it cohesive. Since this is all elementary school and Jr high, it leaves the ability to structure the high school years in another way.

We’ve Got Snow…Again

Snow in Utah 4-3-2023
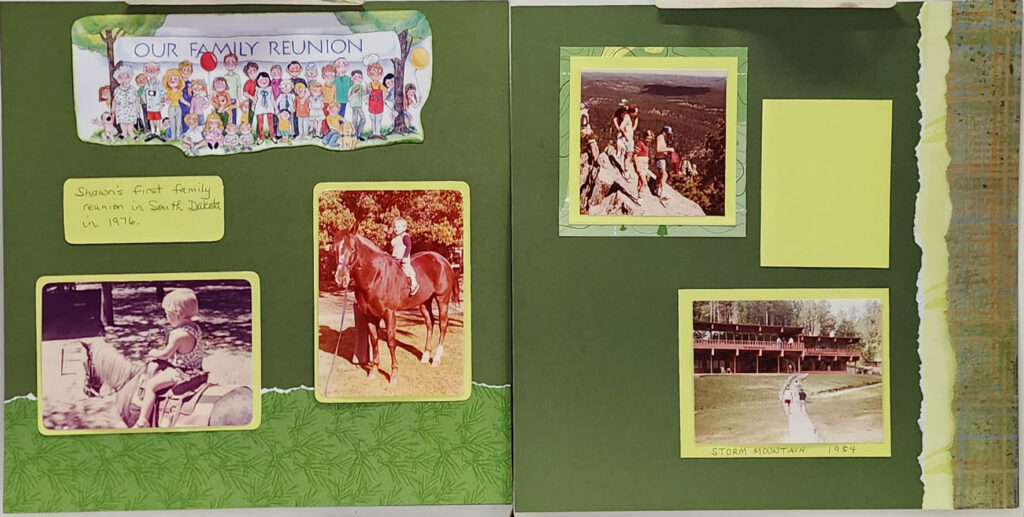
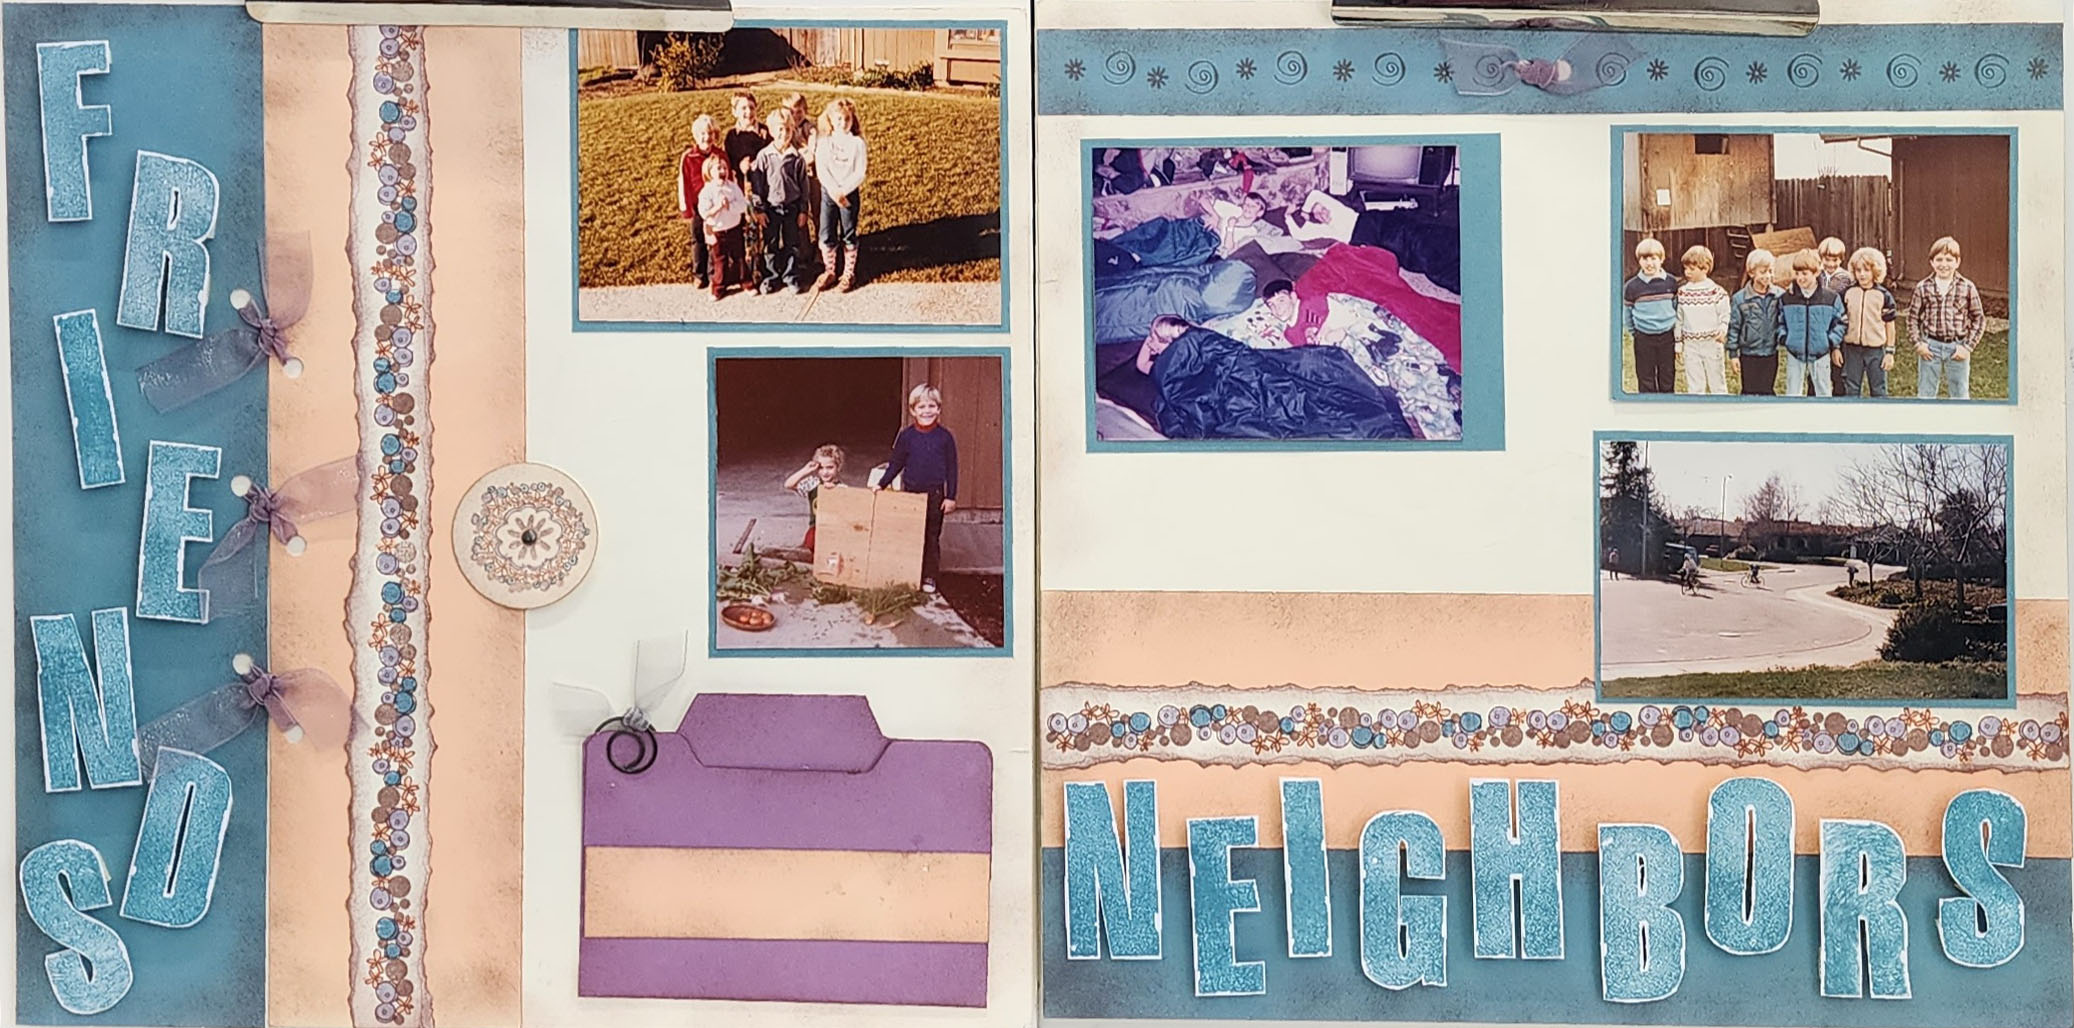
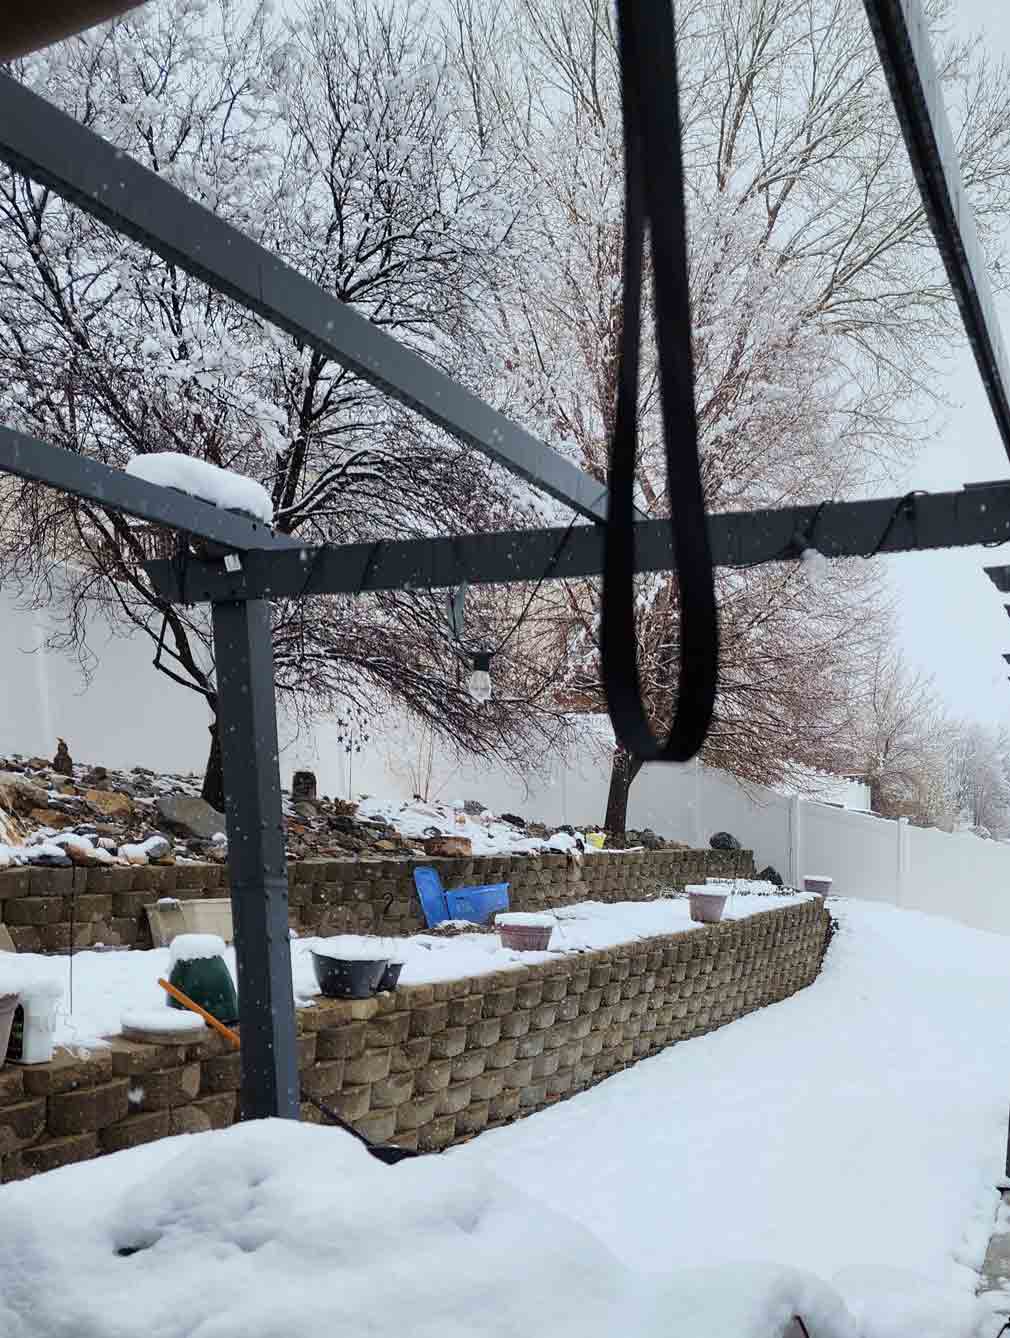
Happy Monday!  I can’t believe that yesterday we had 60-degree weather and no snow was in sight. Today it looks like we have gotten 3″ so far and it is supposed to go on all week!  I am glad that scrapbooking is an indoor activity. Today’s sketch is based on a layout I did of my grandkids many years ago in the snow. I have decided that in order to provide you with sketches each week, and the weekly projects you receive in your e-mail each week (you are on the list, right??) I would have to sketch from some of my finished layouts and leave off the measurements. You can still totally scrap-lift the layout, but this way I can work on tomorrow’s newsletter project.

scrapbook sketch for 3 standard photos
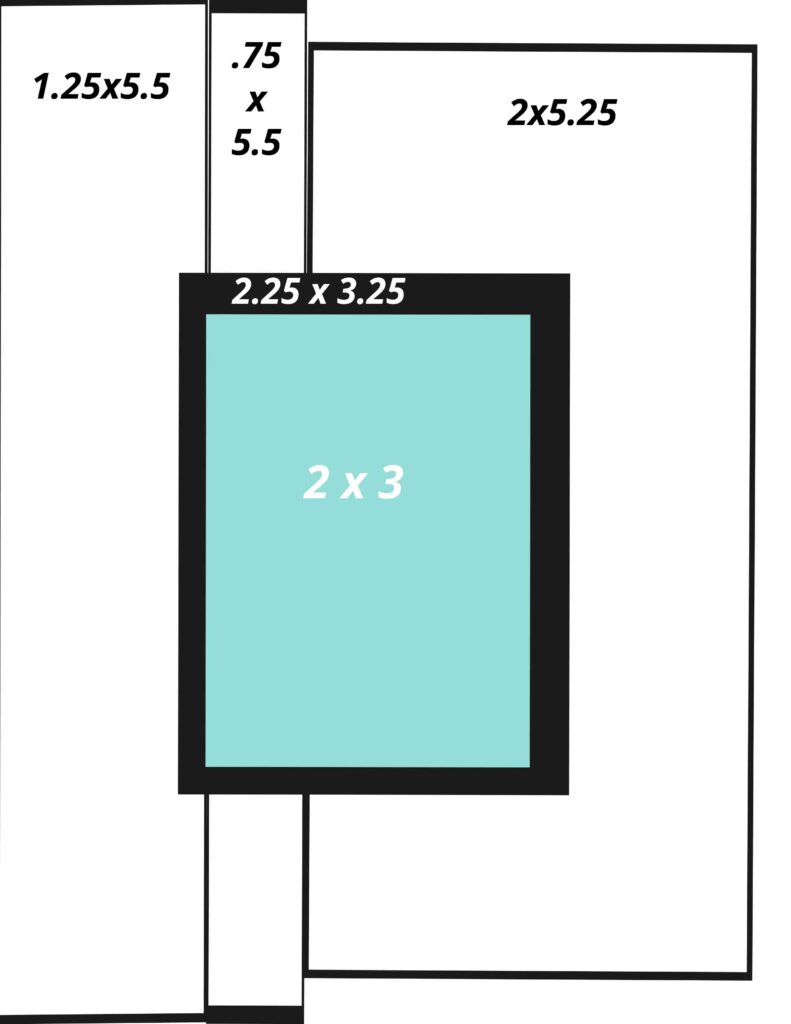
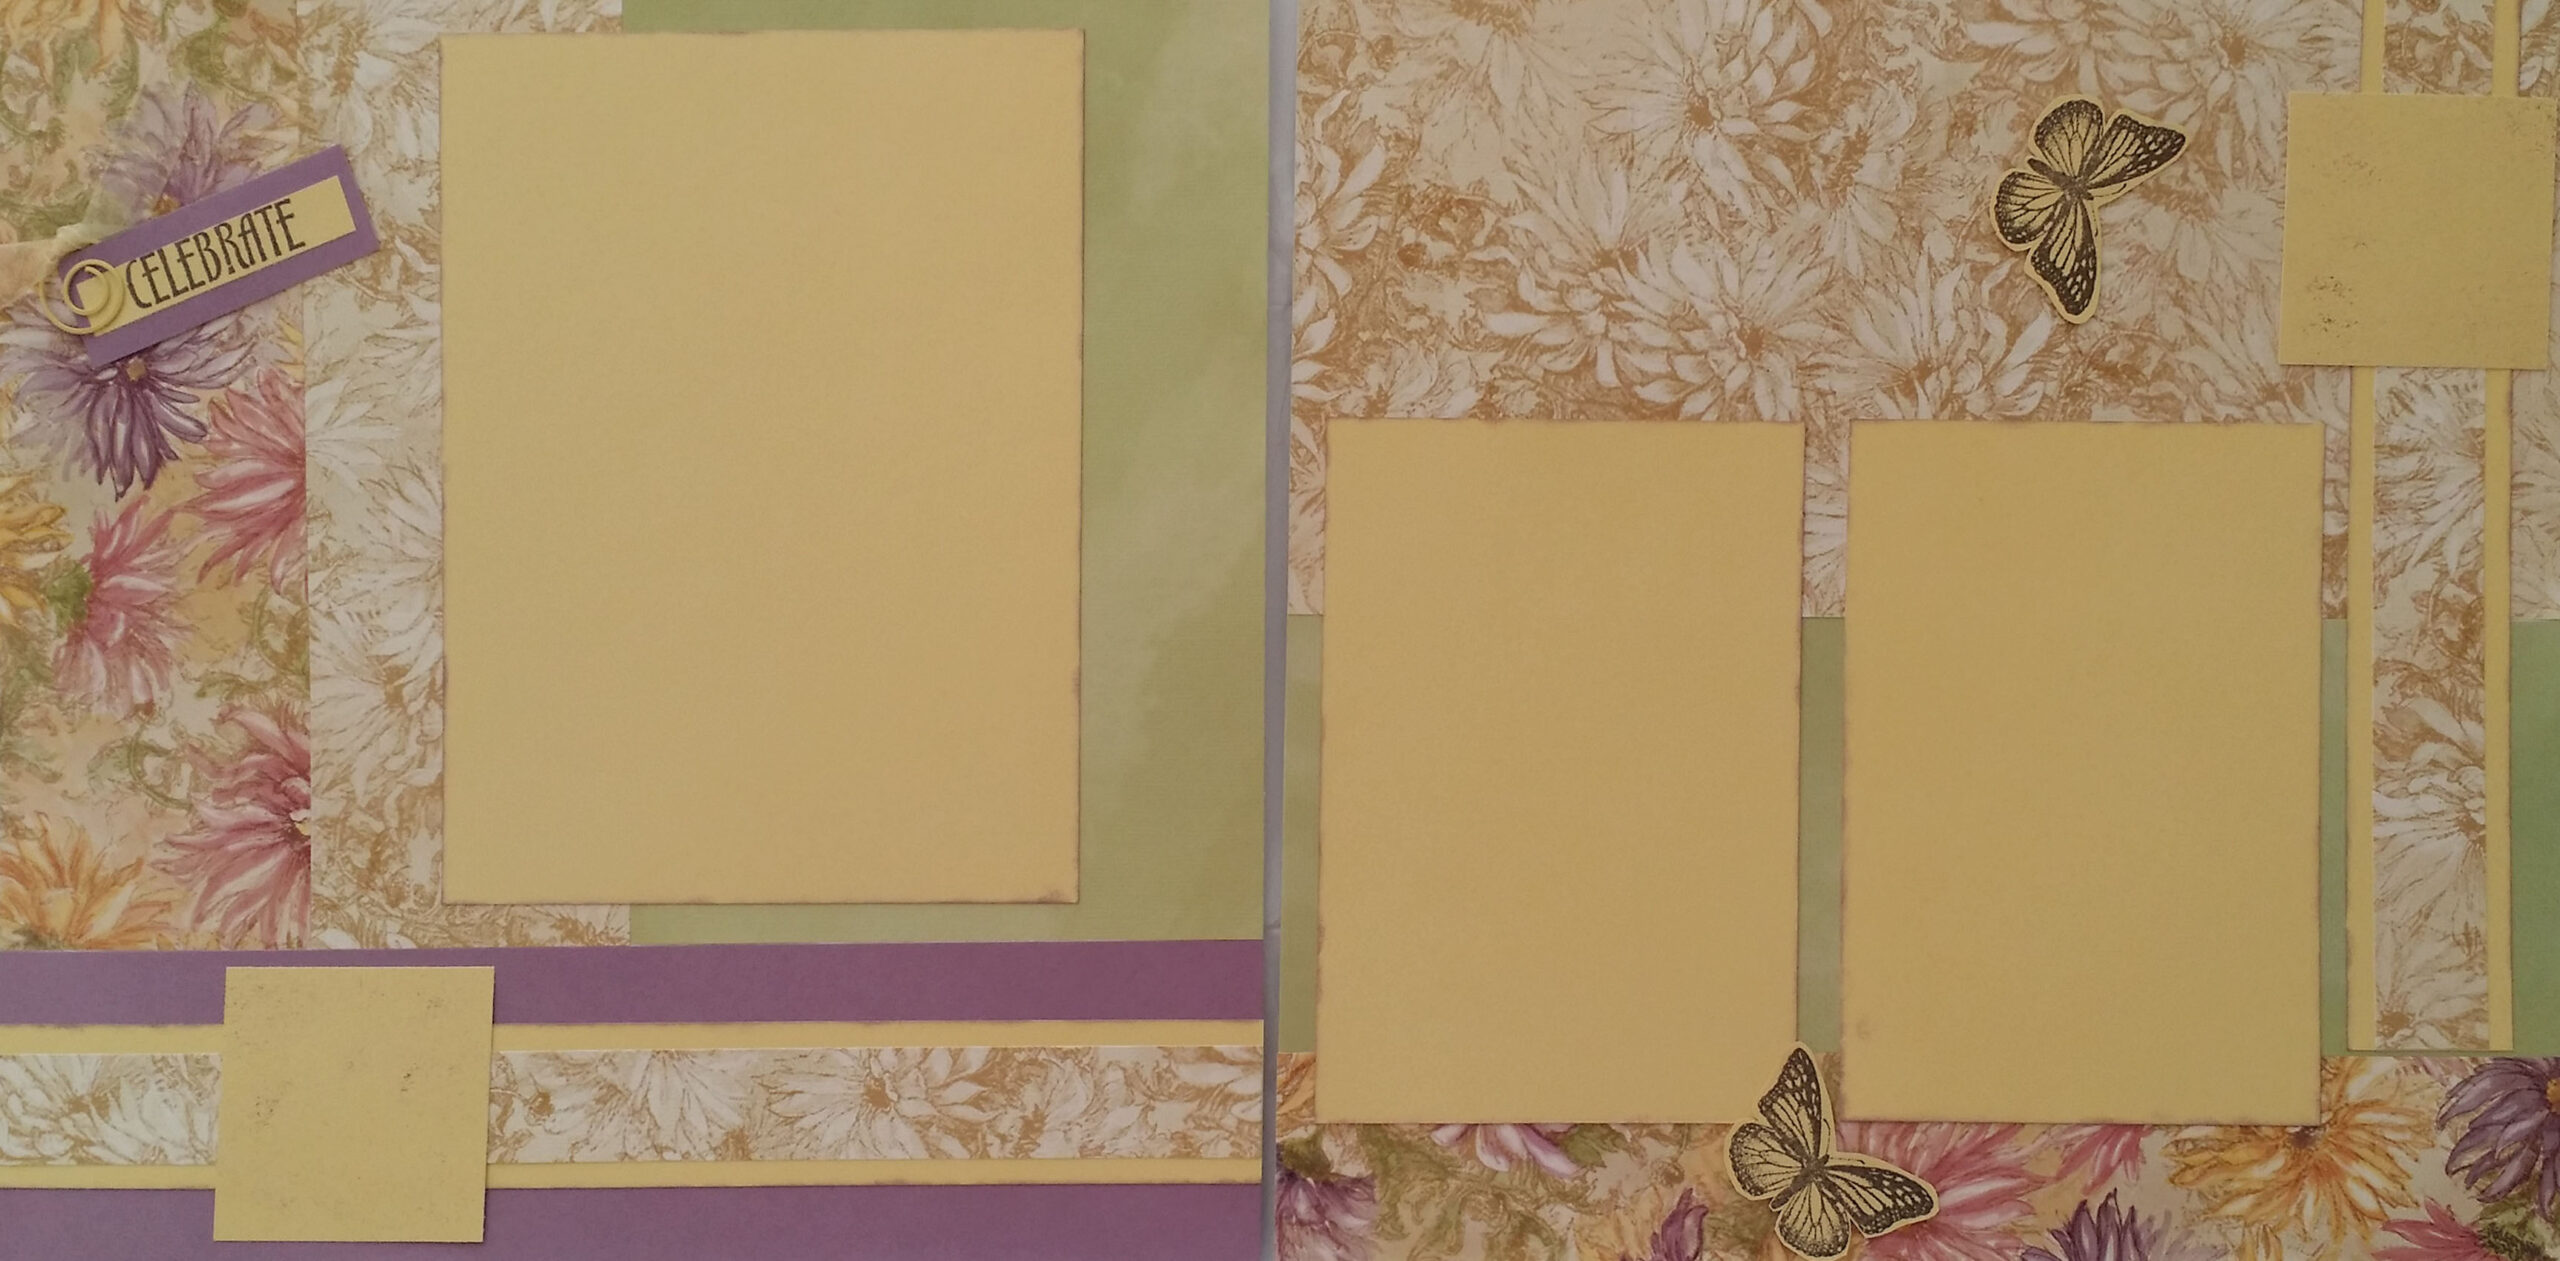
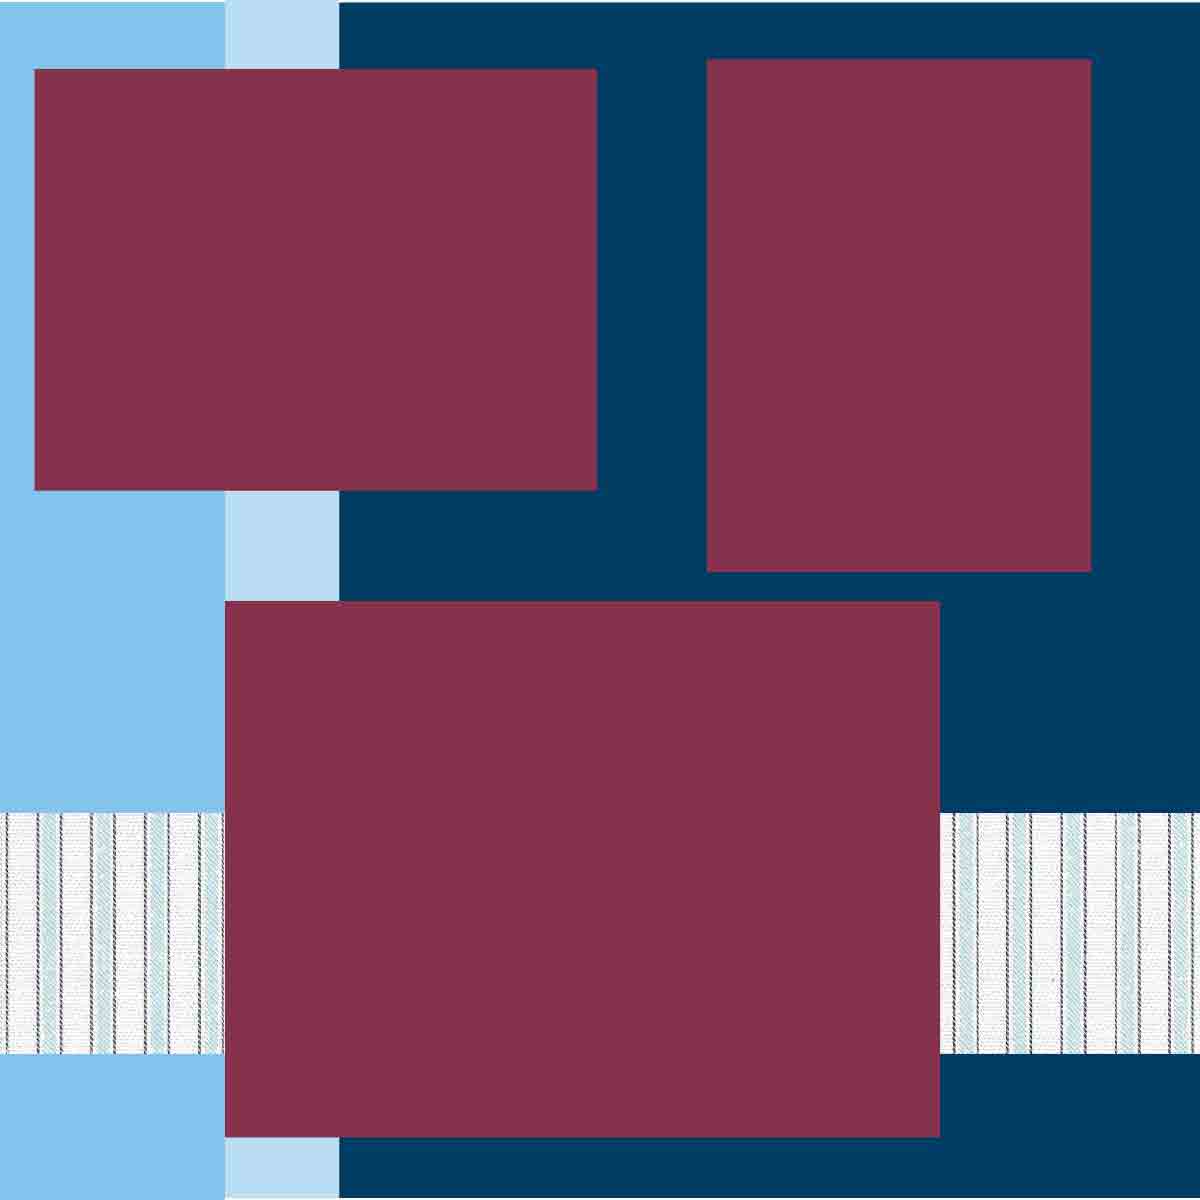
Here is the sketch:  you  have some basic  strips to make up the background, then layer the photos as desired.

Here is the finished layout:Kids playing in snow

I hope you have enjoyed this sketch. In the future you will find projects in my newsletters and only occasionally on the blog so take a moment to sign up for my newsletter in the upper right corner!

Creatively, Carol